 Save
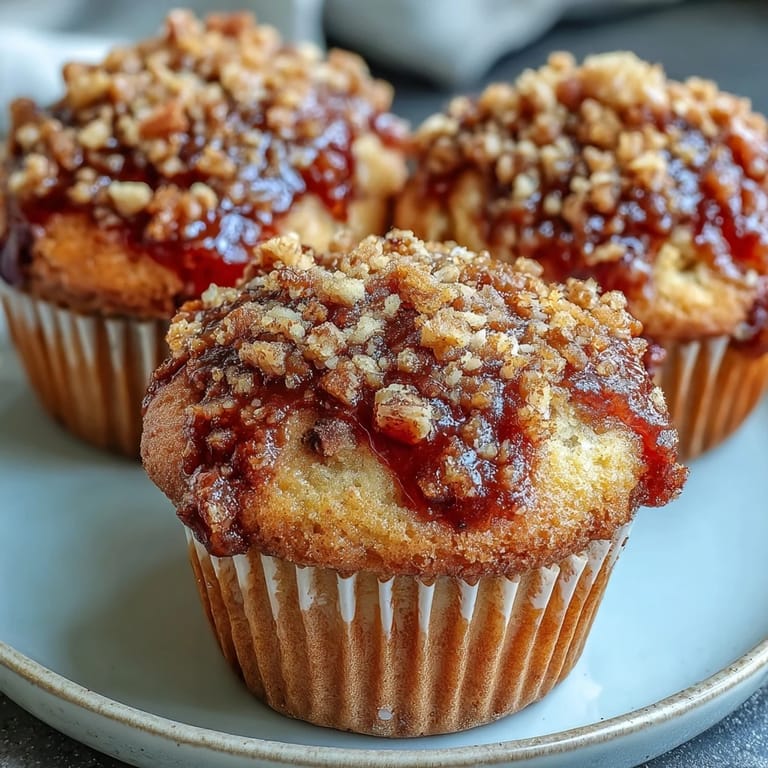
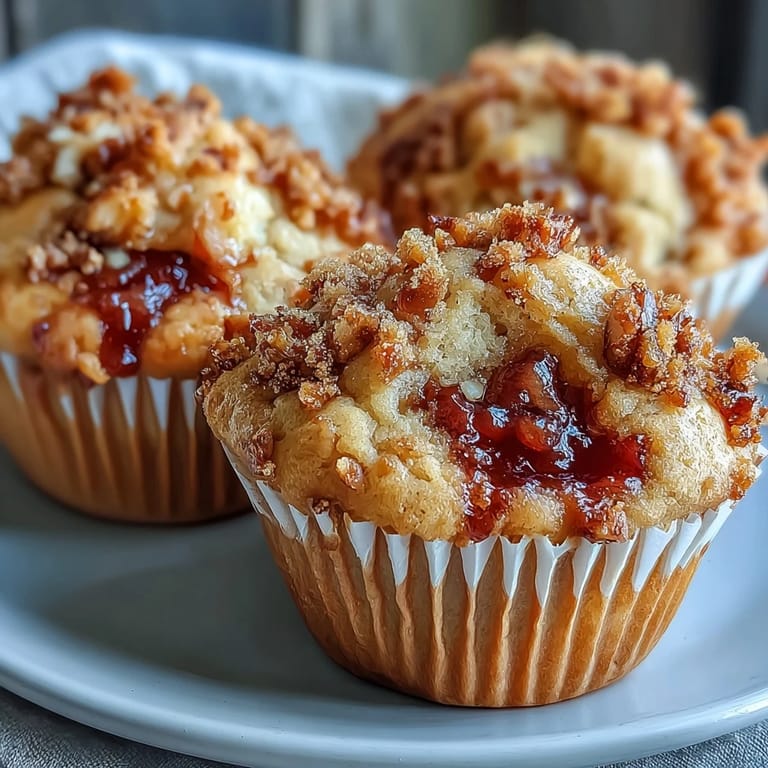
Save There's something about the smell of peanut butter warming in the oven that instantly transports you to childhood, except these muffins taste like someone actually paid attention in pastry school. My neighbor brought over a jar of homemade guava preserves one afternoon, and instead of the polite thank-you-I'll-use-this-eventually response, I found myself stirring peanut butter into melted butter at seven in the morning, convinced that combining two of life's greatest flavors deserved immediate investigation. These muffins emerged from that spontaneous kitchen experiment looking almost too professional for how easy they were to make, with ribbons of guava peeking through tender crumb and that unmistakable peanut butter richness binding everything together.
I made these for a book club meeting last spring, and watching grown adults light up at that first bite reminded me that comfort food doesn't need to be complicated or trendy to matter. One friend asked for the recipe before the muffins were even finished cooling, and another actually went home and baked a batch that same night. There's real power in a treat that bridges the gap between homey and impressive, between something you'd make for yourself on a regular Tuesday and something you'd serve with genuine pride.
Ingredients
- All-purpose flour (2 cups): This is your structure, the backbone that keeps everything tender rather than cakey, so don't skip the weight measurement if you have a scale.
- Baking powder (1 tsp) and baking soda (1/2 tsp): The combination of both creates a muffin that rises properly and stays soft, not just puffy then deflated.
- Salt (1/4 tsp): This tiny amount makes the peanut butter flavor sing instead of tasting dull or one-dimensional.
- Creamy peanut butter (1/2 cup): Use the kind without added oils if you can, as it creates a more stable batter and richer flavor.
- Unsalted butter (1/2 cup, melted and cooled): Cooling it slightly prevents the eggs from scrambling when you add them, a lesson I learned the hard way with lumpy batter.
- Granulated sugar (1 cup): This sweetens the batter itself, not just relying on the guava preserves to do all the sugar work.
- Eggs (2 large): Add them one at a time so they actually incorporate instead of creating little pockets of eggy rawness.
- Whole milk (1 cup): This creates moisture and tenderness, and switching to it changed my muffins from dry to genuinely bakery-quality.
- Vanilla extract (1 tsp): A small amount deepens all the other flavors without announcing itself as vanilla.
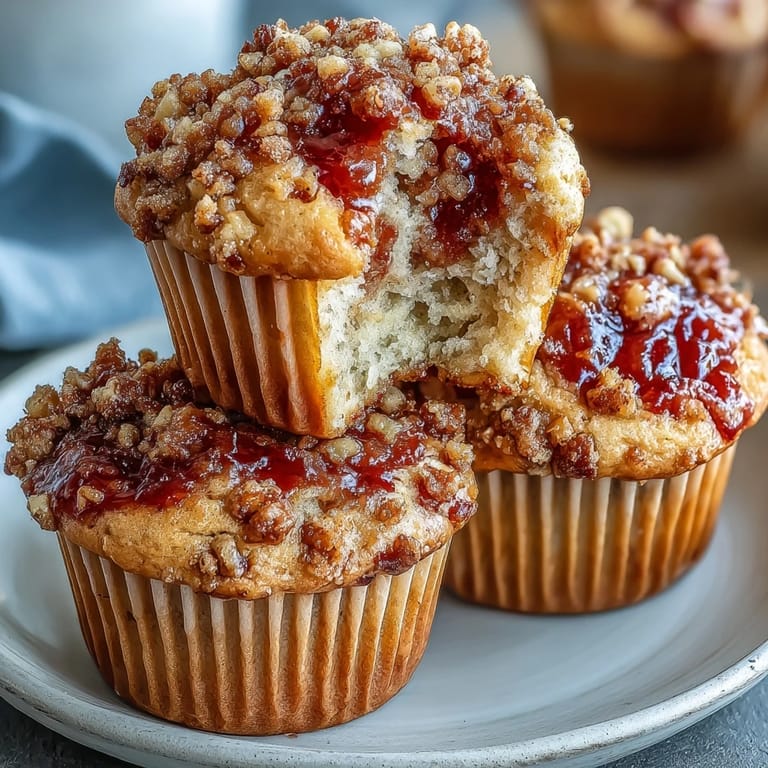
- Guava preserves (2/3 cup): Look for a smooth consistency rather than chunky, so it distributes evenly through the muffin and doesn't sink to the bottom during baking.
- Roasted peanuts, chopped (1/4 cup, optional topping): These add texture and a subtle roasted note that complements both the peanut butter and guava.
Tired of Takeout? 🥡
Get 10 meals you can make faster than delivery arrives. Seriously.
One email. No spam. Unsubscribe anytime.
Instructions
- Prepare your oven and pans:
- Set your oven to 350°F and line your muffin tin with paper liners, pressing them gently into the corners so they stay put. If you're using butter instead, coat it thoroughly so the muffins release cleanly once cooled.
- Combine all the dry ingredients:
- Whisk together your flour, baking powder, baking soda, and salt in a medium bowl, breaking up any tiny lumps as you go. This step distributes the leavening evenly, which is what prevents dense, flat muffins.
- Cream the peanut butter and butter with sugar:
- In a large bowl, beat the peanut butter, melted butter, and sugar until the mixture looks smooth and slightly lighter in color, which takes about 2-3 minutes of mixing. You're not looking for it to be fluffy like you're making frosting, just homogeneous and creamy.
- Add the eggs one at a time:
- Crack an egg into the bowl, mix it in thoroughly, then add the second one and repeat, making sure each is fully incorporated before moving forward. This prevents any raw egg pockets from hiding in your finished muffin.
- Mix in the milk and vanilla:
- Pour in the milk and vanilla extract, stirring until everything looks smooth and combined, about 1-2 minutes of mixing. Don't worry if it looks a bit loose, that's exactly what you want.
- Fold in the dry ingredients gently:
- Add the flour mixture to the wet ingredients a bit at a time, folding with a spatula just until you can't see any white streaks of flour anymore. Overmixing here is how you end up with tough, dense muffins, so resist the urge to stir aggressively.
- Fill the muffin cups halfway:
- Divide the batter evenly among the 12 cups, filling each one about halfway up, using a spoon or ice cream scoop to keep things even. This gives you room for the preserves and the second layer of batter.
- Add the guava surprise:
- Drop about a teaspoon of guava preserves into the center of each muffin cup, not stirring it in but letting it sit there waiting. This creates those beautiful pockets that make every bite feel special.
- Top with the remaining batter:
- Spoon the rest of the batter over the preserves in each cup, covering them completely and smoothing the tops gently. The preserves will rise and peek through during baking, which is exactly what should happen.
- Add the peanut topping if using:
- Sprinkle a small amount of chopped peanuts over each muffin, pressing them down very slightly so they stick to the batter. This adds crunch and a visual cue that something special is inside.
- Bake until golden and just set:
- Slide the pan into the oven for 20-22 minutes, watching for the tops to turn light golden brown. Insert a toothpick into the edge or top of a muffin (not the center where the preserves are, since that will seem wet), and it should come out clean or with just a few crumbs.
- Cool properly before serving:
- Let the muffins rest in the pan for 5 minutes, which gives them time to set and firm up slightly, then turn them out onto a wire rack to cool completely. This prevents them from getting soggy on the bottom while they finish cooling.
 Save
Save These muffins showed up at my daughter's soccer team breakfast last month, and the coach actually asked if they were store-bought because he couldn't believe someone made them from scratch. That moment, watching people genuinely enjoy something that took less than 40 minutes from start to finish, solidified why this recipe lives permanently in my rotation. It's the kind of treat that makes people think you're either naturally talented in the kitchen or woke up at dawn, when really you just found something simple that works.
Swapping Flavors and Making Variations
The beautiful thing about this formula is how flexible it is once you understand how it works. Strawberry jam, raspberry preserves, or even fig spread all create completely different experiences while maintaining that same tender crumb and rich peanut butter base. I once made a batch with lavender honey instead of guava, and while purists might argue that strays from the original idea, those muffins taught me that the structure here is strong enough to handle exploration without falling apart.
Storage and Make-Ahead Strategy
I bake these on Sunday mornings and they last about four days in an airtight container on my counter, though honestly they rarely make it past Wednesday. For longer storage, wrap them individually in plastic wrap and freeze them for up to two months, pulling one out the night before you want it or microwaving it for 20-30 seconds if you're in a rush. The frozen-then-thawed versions actually taste slightly more moist, which might seem counterintuitive but happens because the freezing process affects how water redistributes through the crumb.
Small Details That Actually Matter
Getting these muffins right means paying attention to the small moments that seem inconsequential but actually change everything. The way you fold in the flour, the exact moment you take them out of the oven, even how you cool them afterward all contribute to whether you end up with a muffin that tastes like you made it in a commercial kitchen or like you rushed through dinner. These details aren't about being fussy or obsessive, they're about understanding that baking is equal parts chemistry and intuition, and the best results come from respecting both.
- Use an ice cream scoop or spoon to fill the cups evenly, which ensures they bake at the same rate and look consistent.
- If your guava preserves are very thick, warm them slightly so they distribute more easily through the batter.
- Don't skip the cooling time on the wire rack, as it allows steam to escape and prevents soggy bottoms.
 Save
Save These muffins are the kind of recipe that stays in rotation because they're forgiving, they taste impressive, and they genuinely make people happy. Make them once and you'll understand why they belong in your regular baking repertoire.
Recipe FAQs
- → Can I substitute guava preserves with other fruit spreads?
Yes, strawberry or raspberry jam works well, maintaining the sweet and tangy contrast while offering a familiar flavor profile.
- → What is the best way to store these muffins?
Store in an airtight container at room temperature for up to 3 days, or freeze them for up to 2 months to maintain freshness.
- → How do I prevent the muffins from becoming dry?
Be careful not to overmix the batter and avoid baking longer than necessary; the combination of peanut butter and milk helps keep the texture moist.
- → Can I add chopped peanuts on top before baking?
Yes, sprinkling chopped roasted peanuts adds a crunchy texture and enhances the nutty flavor profile.
- → What are the key baking steps to ensure even cooking?
Fill muffin cups halfway, add guava preserves in the center, then cover with remaining batter before baking at 350°F for about 22 minutes or until a toothpick near the edge comes out clean.
- → Are these muffins suitable for vegetarian diets?
Yes, the ingredients used align with vegetarian guidelines, containing no meat or fish products.