 Save
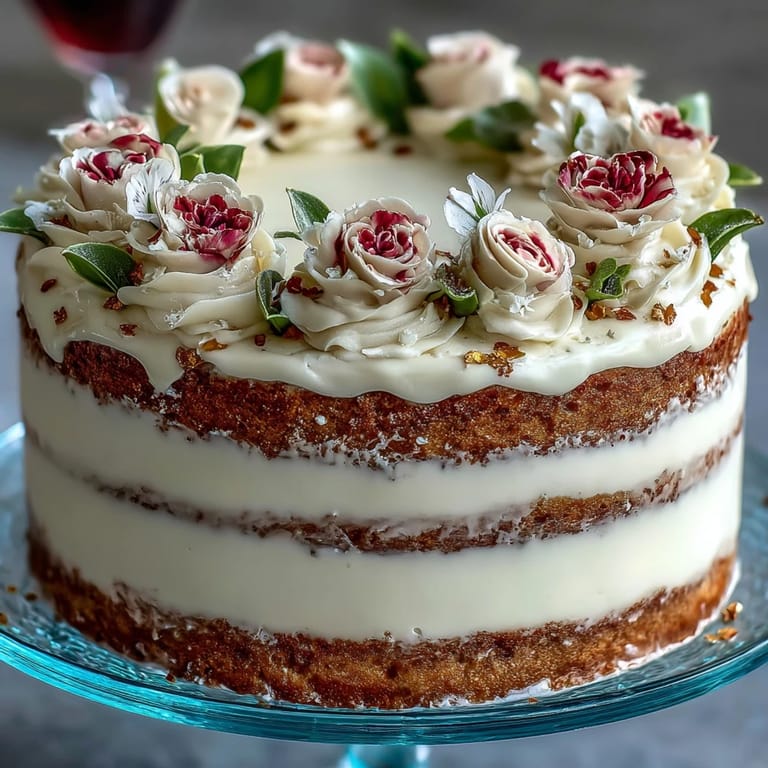
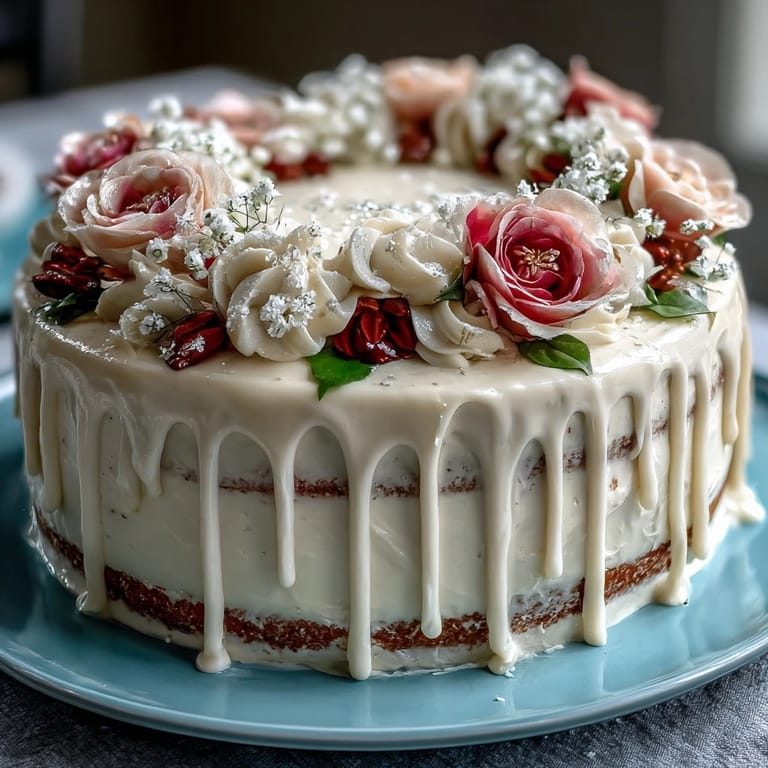
Save My friend texted me three weeks before her graduation that she wanted one cake to celebrate two things at once—her degree and her Taurus birthday, both happening the same week. She sent me a mood board of soft florals and gold accents, and I realized this wasn't just about baking; it was about creating something that felt as intentional as her accomplishments. The vanilla cake had to be elegant but not fussy, and the buttercream flowers needed to feel like they were hand-painted by someone who actually cared.
I tested this cake at home on a quiet Tuesday afternoon, and the moment I pulled the layers from the oven, the smell hit me—warm butter and vanilla filling my entire kitchen. My partner wandered in asking what I was making, and when I explained the floral decorating plan, he watched me practice piping on parchment like I was doing something wildly complicated. By the third practice flower, I wasn't nervous anymore; my hand just knew what to do.
Ingredients
- All-purpose flour (2 1/2 cups): This is your foundation, and sifting it with the baking powder ensures even rising throughout all three layers.
- Baking powder (2 1/2 tsp): Don't skimp or use baking soda as a substitute; the chemistry here creates that featherlight crumb that keeps the cake from feeling dense.
- Salt (1/2 tsp): A small amount that amplifies the vanilla and butter flavors without tasting salty at all.
- Unsalted butter, softened (1 cup for cake, 1 1/2 cups for frosting): Room temperature butter creams properly; cold butter won't incorporate air, and the frosting won't fluff.
- Granulated sugar (2 cups): The beating time matters here—this is when you trap air bubbles that make the cake rise.
- Eggs (4 large, room temperature): Cold eggs won't emulsify properly with the butter; set them out 30 minutes before mixing.
- Pure vanilla extract (1 tbsp for cake, 2 tsp for frosting): Real vanilla makes a noticeable difference in flavor depth that imitation cannot match.
- Whole milk, room temperature (1 cup): This creates a tender crumb and helps the layers stay moist; using cold milk will shock the warm batter.
- Powdered sugar, sifted (5 cups): Sifting removes lumps that create gritty frosting, which is worth the two extra minutes.
- Heavy cream or milk for frosting (2-4 tbsp): Start with 2 tablespoons and add more until you reach a spreadable, pipeable consistency.
- Gel food coloring (assorted floral shades): Gel holds its color better than liquid coloring and doesn't thin out your buttercream like water-based versions do.
- Edible gold leaf or sprinkles (optional): A Taurus touch—subtle luxury that catches the light when people lean in to admire the cake.
Tired of Takeout? 🥡
Get 10 meals you can make faster than delivery arrives. Seriously.
One email. No spam. Unsubscribe anytime.
Instructions
- Prep Your Pans and Oven:
- Preheat to 350°F (175°C) while you grease and line three 8-inch round pans with parchment paper; this prevents sticking and ensures even baking. The parchment overhang makes unmolding feel almost magical.
- Combine Dry Ingredients:
- Whisk flour, baking powder, and salt together in a medium bowl to distribute the leavening evenly. This step takes less than a minute but prevents lumps from forming later.
- Cream Butter and Sugar:
- Beat softened butter and sugar for 3-4 minutes until pale, fluffy, and noticeably lighter in color; you're incorporating air that becomes the cake's structure. Stop occasionally to scrape down the bowl so everything creams evenly.
- Add Eggs Gradually:
- Introduce eggs one at a time, beating well after each addition; rushing this step means streaky, poorly incorporated eggs that bake into dense patches. The mixture should look smooth and slightly curdled before adding milk.
- Alternate Wet and Dry:
- Begin with flour mixture, then milk, then flour, ending with flour to protect the batter from becoming tough; mix only until combined, not smooth. Overmixing activates gluten and creates a denser, chewier cake.
- Divide and Bake:
- Pour batter evenly into prepared pans, smooth the tops, and bake for 28-35 minutes until a toothpick inserted in the center comes out clean. The layers will look slightly domed in the center—that's perfect.
- Cool Properly:
- Let cakes rest in pans for 10 minutes (they set slightly), then turn out onto wire racks to cool completely; rushing this step causes crumbling. Completely cooled layers are essential for frosting and decorating.
- Make Buttercream:
- Beat softened butter on medium speed until creamy, then gradually add sifted powdered sugar to avoid a flour-like cloud of sugar in your kitchen. Mix in vanilla, then cream, and beat for 3-4 minutes more until it transforms into something billowy.
- Tint and Prepare Colors:
- Divide buttercream into separate bowls and add gel coloring drop by drop, stirring until you reach your desired floral shades. Gel coloring is potent—a tiny dab goes a long way, and you can always add more but never remove it.
- Layer with Precision:
- Place the first cake layer on your serving plate, spread a thin, even layer of buttercream, then repeat with remaining layers, ensuring each layer sits flat. Uneven layers lead to a tilted cake, so take your time here.
- Crumb Coat:
- Apply a thin coat of plain buttercream to seal in crumbs, then refrigerate for 20 minutes; this creates a clean foundation for your final coat. Skipping this step results in crumbs mixing into your beautiful final frosting.
- Final Frosting:
- Apply your smooth final coat of buttercream using an offset spatula, rotating the cake as you work for even coverage. A turntable makes this easier, but a lazy Susan or even your hand works fine.
- Pipe Floral Designs:
- Fill piping bags with colored buttercream and use petal, leaf, and round tips to create flowers, vines, and accents around the cake. Start with basic shapes—small petals, curved leaves—and trust that they'll look intentional once clustered together.
- Add Celebratory Touches:
- Finish with edible gold leaf or sprinkles to represent the Taurus symbol or graduation cap, placing them where the eye naturally travels. A small detail like this transforms the cake from pretty to personal.
- Chill and Serve:
- Refrigerate the finished cake until ready to serve, then let it come to room temperature for 15-20 minutes before slicing for cleaner cuts. Cold cake slices more sharply, warm cake tastes better.
 Save
Save Watching my friend's face when she opened her graduation gift felt like the cake had already done its job. She turned it slowly to admire every piped flower, running her finger along the gold accents, and whispered that it was too pretty to eat. We cut into it anyway, of course, and when people bit into those soft, buttery layers, they understood—this cake tasted like someone had spent time thinking about her.
Why Vanilla Matters Here
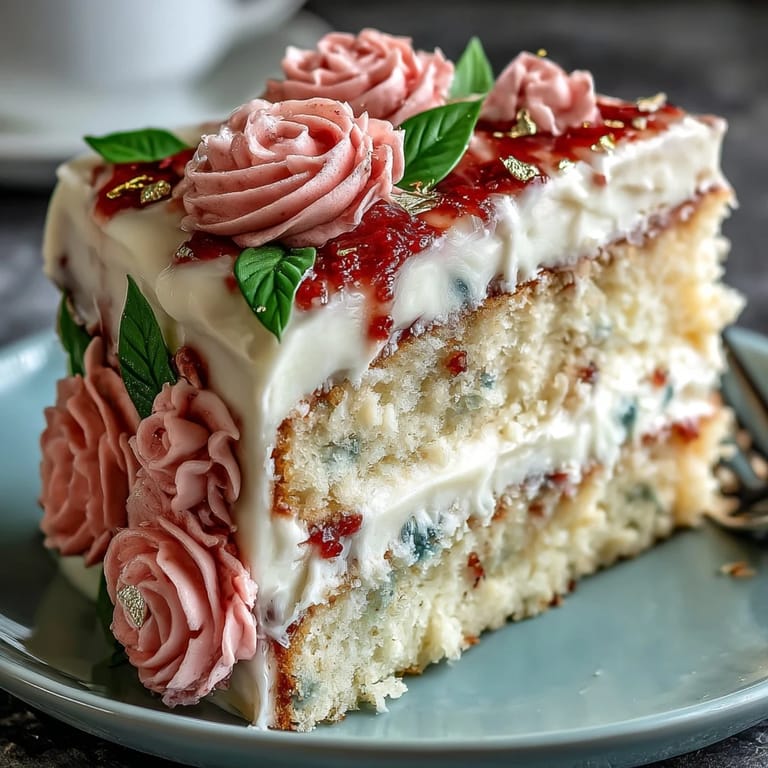
A celebration cake doesn't need fancy flavors competing for attention; it needs a clean, sophisticated base that lets the decoration shine. Pure vanilla extract creates a subtle sweetness that feels timeless, not trendy, which is exactly right for marking a major life milestone. The butter-to-sugar ratio ensures the cake stays tender even after days of refrigeration, so it works whether you're serving it the day you make it or holding it for a small gathering later.
Mastering the Buttercream
Buttercream intimidates people, but it's really just butter and sugar learning to get along. The key is temperature and patience—cold butter won't whip, and rushing the addition of powdered sugar creates a lumpy, gritty frosting. Once you've beaten it enough, something magical happens; it goes from looking separated and broken to becoming this cloud-like, spreadable wonder that holds any shape you pipe.
Piping Flowers Without Fear
If you've never piped before, this cake is actually a perfect first project because floral designs don't need to look anatomically correct—just intentional. A petal tip creates natural-looking petals; leaf tips make curved leaves; a round tip creates centers and fills gaps. Practice on parchment paper while watching television, and by the time you start on the cake, your hand has muscle memory. Small mistakes become character, and clusters of similar flowers hide any imperfections beautifully.
- Start piping flowers near the base of the cake and work upward so gravity helps, not works against you.
- Keep your piping bags angled consistently so petals face the same direction and look intentional rather than random.
- Step back occasionally to see how your design is balancing across the cake instead of getting lost in details.
 Save
Save This cake celebrates someone moving forward, and there's something deeply right about that—marking both growth and the people who witness it. Bake it with intention, decorate it with whatever time and patience you have, and trust that the care you put in shows.
Recipe FAQs
- → What is the best way to achieve smooth cake layers?
Ensure even batter distribution in pans and level the tops with a spatula before baking. After cooling, trim any domed tops for flat, even layers.
- → How can I get vibrant floral colors in buttercream?
Use gel food coloring sparingly and mix thoroughly into the buttercream until you reach desired shades without altering texture.
- → What techniques are recommended for piping floral decorations?
Utilize petal, leaf, and round piping tips and practice pressure control to create realistic flower petals, leaves, and vines.
- → How do I prevent buttercream from melting while decorating?
Keep the buttercream chilled before use and work in a cool environment to maintain firmness during piping.
- → Can I prepare decorations ahead of time?
Yes, floral buttercream decorations can be piped onto parchment, chilled, then carefully transferred onto the cake for intricate designs.