Save
Save You know a dessert is unforgettable when everyone in the kitchen pauses just to admire it. That’s exactly what happened the first time I turned out this Rainbow Jelly Cake onto a plate: curtains of jewel-bright layers stood so brightly, we ended up laughing and taking pictures before anyone dared to scoop a slice. The subtle wobble of agar-agar, gently perfumed with coconut, has become my go-to for summer days when ovens aren’t even a consideration. Watching the colors bloom as I pour each layer makes the whole process feel a little bit like edible magic. Whether you love a little whimsy or need a showstopper that suits all diets, this is the cake you'll want on standby.
One rainy afternoon, my sister and I challenged each other to make any treat using what we already had in the cupboard, and this cake was the colorful result. Spilled food coloring and all, the cleanup was totally worth it, especially after seeing our rainbow slice up on the table next to mugs of tea. It has since become the birthday request at almost every summer family party, and the layers never fail to get a round of applause.
Ingredients
- Agar-agar powder: The magic behind the set, agar-agar gives these layers their firm but tender texture; dissolve it thoroughly for smooth results.
- Granulated sugar: Gives a gentle sweetness—experiment with less sugar if you prefer a more subtle taste.
- Water: Keeps the jelly layers clear and bright; make sure to measure accurately so they set perfectly.
- Food colorings: Go wild with bold rainbow hues, or use naturals from beet, turmeric, or spirulina for a gentle look.
- Vanilla extract: A trick I picked up for an extra note of coziness, though it’s totally optional.
- Coconut cream: The creamy layer adds richness that’s both dairy-free and decadent—full-fat makes it extra luscious.
- Pinch of salt: Don’t skip this; it brightens the sweetness and brings everything into balance.
Tired of Takeout? 🥡
Get 10 meals you can make faster than delivery arrives. Seriously.
One email. No spam. Unsubscribe anytime.
Instructions
- Create the Lovely Jelly Base:
- Combine agar-agar powder with water in your saucepan and whisk while bringing to a gentle boil. As soon as everything dissolves and turns slightly glassy, stir in your sugar (and vanilla, if using) until crystal clear and fragrant.
- Divide and Add Color:
- Pour the hot, clear mixture into six little bowls, each waiting for its own rainbow hue. Swirl in the food coloring—watch as the colors deepen—then set ready for layering.
- Build Your Rainbow:
- Carefully pour the first (red) layer into the prepared mold, let it sit at room temp until just set, then add each successive colored layer, always checking it’s only just firm before adding the next to avoid slipping. Your patience will be rewarded by the time the last purple layer nestles in place.
- Prepare Coconut Cream Finale:
- In a clean pot, whisk agar-agar with water and coconut cream, bringing it gently to a simmer. Boost sweetness and flavor with sugar and a pinch of salt, stirring until you have a silky, slightly thickened pale mixture.
- Crown the Cake with Coconut:
- Gently pour the coconut cream mixture as the capstone layer, letting it softly meet the vivid jellies below. Let this rest on the counter to cool before tucking it into the fridge for the ultimate chill.
- Chill and Unmold:
- Once thoroughly set (about an hour), slide a knife around the edge and invert the mold in a single, calm breath—the cake should land softly onto your platter, stripes and all.
- Slice and Serve!
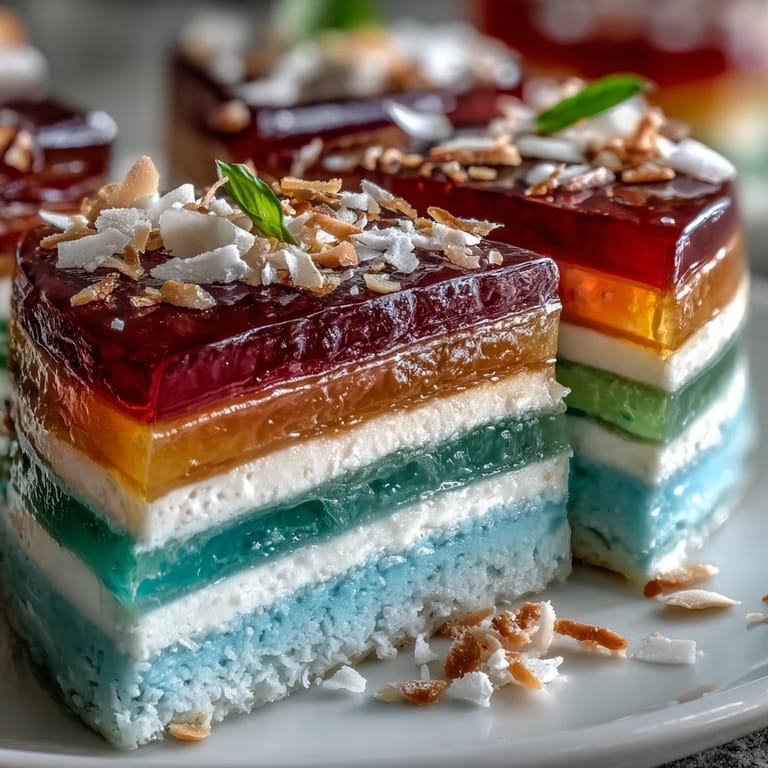
- Cut neat wedges or cubes and serve cold—prepare for a chorus of wow as the rainbow glistens in the light.
 Save
Save 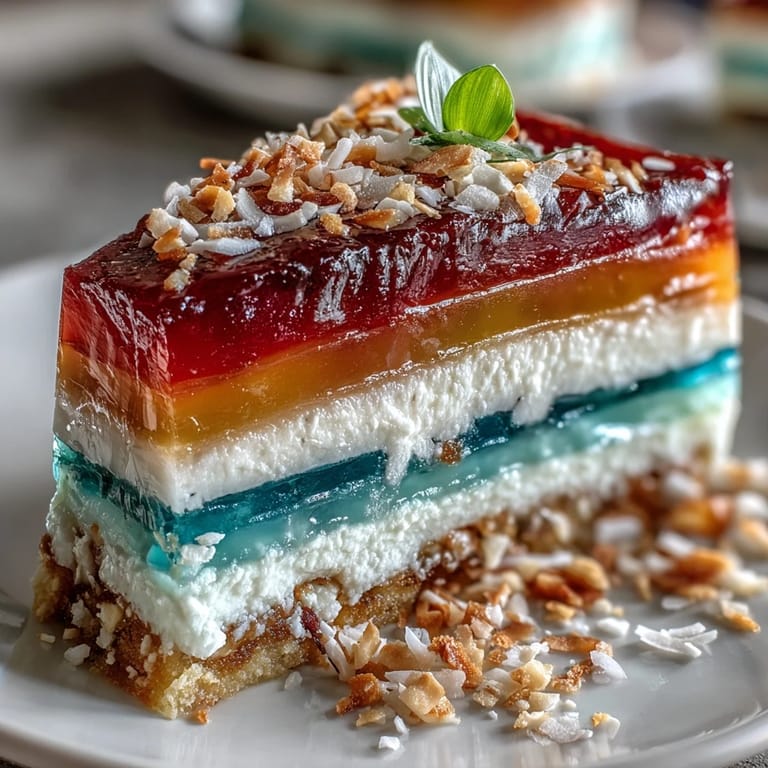 Save
Save The first time I made this for a birthday, my nephew’s eyes went as wide as the cake itself, and for a moment he just traced every color with his finger instead of eating. That joyful hush around the table is a memory I can almost taste every time I unmold this dessert, and honestly, it adds a little extra sweetness to each slice.
How to Color and Layer Without Stress
Working quickly with agar-agar is key, but remember, it sets at room temperature so you don’t need to panic if you see it thickening in the bowl—just whisk or warm it gently. Having all your colors and tools ready before pouring let me actually enjoy the rainbow-building with much less mess and worry.
Choosing the Right Coconut Cream
Full-fat coconut cream always creates the most luxurious final layer: it turns out rich, opaque, and won’t separate as it cools. Avoid the thin, watery varieties if you want that perfect contrast against the translucent jelly stripes.
Make-Ahead, Storage, and Serving Ideas
The beauty of this jelly cake is how well it holds up for gatherings: I’ve often made it a day ahead, unmolded just before guests arrive, and the colors shine just as bright. Always cover after slicing to keep it from drying out and use a very sharp knife for the cleanest stripes.
- For fuss-free release, warm the mold with a damp towel before inverting.
- Pair with fresh fruit or lychee for a tropical twist.
- If you want sharper lines, let each layer chill a bit more than you think is necessary.
 Save
Save  Save
Save I hope you get the same ripple of happy surprise at your table that I do every time I serve this cake. Have fun layering, and may your rainbow slices be the talk of your next gathering!
Recipe FAQs
- → Can I swap agar-agar for gelatin?
Agar-agar and gelatin behave differently: agar sets firmer and holds at room temperature, while gelatin yields a softer, wobbly texture and is animal-derived. For a vegan, firm finish stick with agar-agar; if using gelatin, reduce quantity and chill thoroughly.
- → How long should each colored layer set?
Let each layer rest until it is just set on the surface but still slightly warm underneath—typically 5–8 minutes depending on layer thickness and room temperature. This helps the next layer adhere without blending colors.
- → Any tips for getting sharp, even layers?
Pour slowly and gently from a low height, cool the previous layer until not liquid but still tacky, and use a small offset spatula or the back of a spoon to ease the flow. Keep molds level and work in a cool room to speed setting.
- → What natural colorings work best?
Pandan or matcha for green, beet or strawberry for red/pink, carrot or turmeric for orange/yellow, butterfly pea for blue, and purple sweet potato for purple. Use concentrated extracts or juices sparingly to avoid altering set or flavor.
- → How long can the finished cake be stored?
Cover and refrigerate for up to three days. Keep it chilled until serving to maintain texture; avoid freezing, as ice crystals can break the gel structure.
- → How do I unmold without damaging the layers?
Loosen edges with a thin spatula, briefly dip the bottom of the mold in warm water for a few seconds to release, then invert onto a plate. Handle gently to preserve the layered appearance.