Save
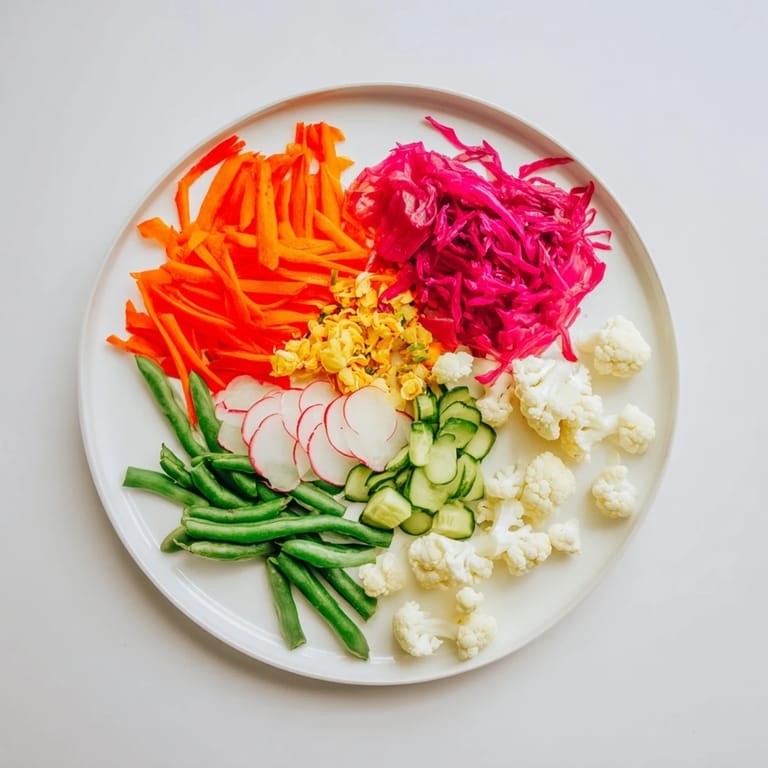
Save I'll never forget the summer I discovered a farmers market in a neighborhood I'd just moved to, where an elderly vendor with jars of impossibly vibrant pickled vegetables stopped me in my tracks. She handed me a slice of pickled radish, and something clicked—that perfect balance of crisp, tangy, and alive. That moment sparked an obsession with creating my own rainbow of pickled and fermented treasures at home, turning what felt like a chef's secret into my kitchen staple.
I still remember the first time I served this colorful feast to friends—the way their eyes lit up when they saw the linear arrangement of reds, purples, and greens, and how conversation naturally slowed as people reached for more. One friend asked for the recipe right there, and I realized I'd created something that bridged the gap between nourishment and pure joy.
Ingredients
- Carrots, julienned (1 cup / 120 g): They keep their snap longer than softer vegetables and add a natural sweetness that mellows beautifully in the brine
- Cucumber, sliced (1 cup / 120 g): Choose smaller, firmer cucumbers if possible—they won't get mushy and stay that satisfying crunch you're after
- Radishes, thinly sliced (1 cup / 100 g): These are the wild card that brings peppery heat and stay crispy for weeks
- Red cabbage, shredded (1 cup / 120 g): The color intensifies beautifully as it pickles, and it's sturdy enough to hold its texture through fermentation
- Cauliflower florets (1 cup / 80 g): Keep them small—they pickle evenly and become almost buttery in texture
- Green beans, trimmed (1 cup / 120 g): A texture revelation when pickled; they transform from ordinary to that perfect snap between your teeth
- White vinegar (2 cups / 480 ml): The backbone of your brine; I learned to never use the cheapest version because the flavor difference is real
- Water (2 cups / 480 ml): Filtered water if you have it makes a subtle but noticeable difference in clarity and taste
- Sugar (2 tbsp / 30 g): This balances the acid without making things sweet—it's about harmony, not dessert
- Kosher salt (2 tbsp / 30 g): The coarser crystals dissolve more evenly than table salt, which I discovered the hard way
- Garlic cloves, sliced (2): Slice them thin so the flavor distributes throughout; whole cloves can be overpowering
- Mustard seeds (1 tbsp / 10 g): These little pearls add complexity and a subtle nuttiness that develops over days
- Coriander seeds (1 tbsp / 10 g): The spice that makes people ask what's in here—it's warmth in a jar
- Black peppercorns (1 tsp / 3 g): Whole peppercorns stay potent longer than ground pepper would
- Bay leaves (2): Two is the sweet spot; more than that and you're making medicine instead of magic
- Fresh dill (3 sprigs): The herbaceous finish that reminds you this came from something alive and growing
- Red chili, sliced (1 small, optional): This is your heat lever—adjust to your courage level
- Kimchi (1 cup / 120 g, optional): Store-bought is fine here; it adds funk and fermented complexity without the wait
- Sauerkraut (1 cup / 120 g, optional): The probiotic powerhouse that makes your gut whisper thank you
Tired of Takeout? 🥡
Get 10 meals you can make faster than delivery arrives. Seriously.
One email. No spam. Unsubscribe anytime.
Instructions
- Prep Your Canvas:
- Wash all your vegetables under cool running water, and get your knife sharp—dull knives crush vegetables instead of slicing them cleanly, and you want every piece to catch light and look alive on the plate. As you cut, think about thickness; you're aiming for that sweet spot where things pickle evenly but don't dissolve into mush. Arrange each vegetable as you go so you can see the rainbow you're building.
- Create the Brine Magic:
- Pour your vinegar and water into a saucepan and bring it to a gentle boil—watch for the first wisps of steam rather than a rolling boil. Add sugar and salt, stirring until they vanish completely into the liquid. This is where you can smell the transformation happening; take a moment to inhale that sharp vinegar aroma because it's about to become something more complex. Remove from heat and let it cool just slightly so it's warm but not so hot it'll make glass jars crack.
- Build Your Jars with Purpose:
- This is where the magic becomes visual. Use clean glass jars or small bowls, and pack your vegetables in with intention—group colors together, arrange them in lines or grids depending on your mood, make it something you want to look at. Tuck the garlic slices, mustard seeds, coriander seeds, peppercorns, and bay leaves throughout like you're placing edible jewels, distributing them so every jar gets that full spice experience. Add your dill sprigs and chili (if you're brave) with the same care.
- The Brine Embrace:
- Pour your still-warm pickling brine slowly over everything, watching it cascade around your carefully arranged vegetables. Make sure every single piece is completely submerged—anything poking above the brine will oxidize and turn dark. This is non-negotiable; it's the difference between preserved treasure and disappointing mold.
- The Patience Phase Begins:
- Seal your jars and let them cool to room temperature on your counter, where you can see them. Resist the urge to open them and taste; the flavor is still assembling itself. Once cool, slide them into the refrigerator. The pickles are technically ready in 12 hours if you're impatient, but 24 to 48 hours is when they reveal their full personality.
- If You Want True Fermentation:
- For the living, probiotic version, prepare a simpler 2% salt brine (20g salt per 1 liter of water) and pack vegetables the same way. Leave these jars at room temperature where you can watch them bubble and transform, checking daily that vegetables stay submerged, pressing them down gently if they float. After 5 to 7 days, they'll taste alive in a completely different way—funkier, more complex, more your friends will ask about.
- The Grand Finale Arrangement:
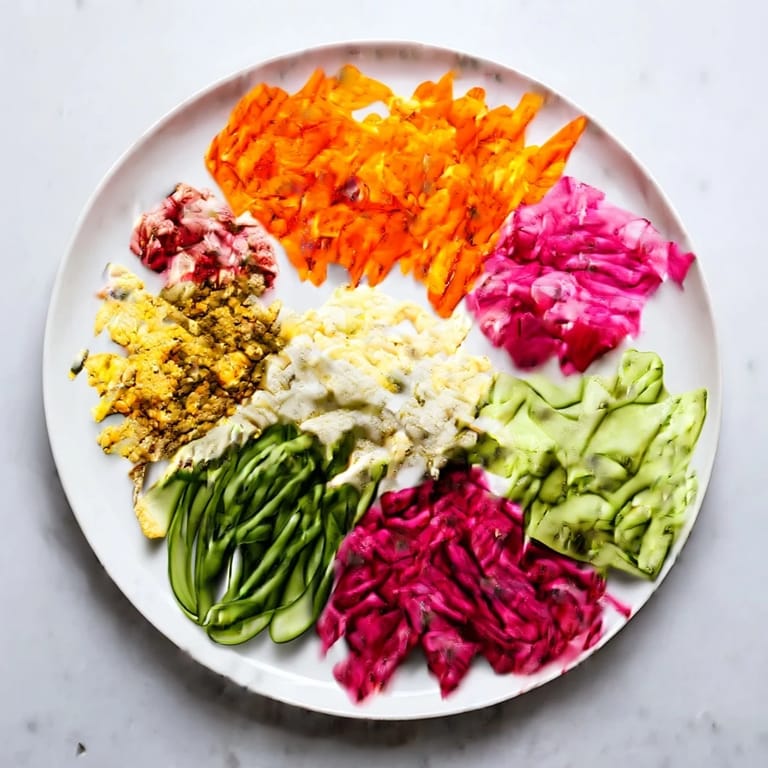
- When you're ready to serve, transfer your jars to a beautiful board or tray, arranging them so the colors catch light from different angles. The linear and grid patterns make people stop and look before they even taste, and when they do taste, they understand why you made this.
 Save
Save There's a moment that happens about three days into fermentation when you open the jar to check on things, and the aroma that rises up is so alive and complex that you realize you're no longer following a recipe—you're creating something, the way people have been for centuries. That's when pickles stop being a side dish and become a conversation about patience, transformation, and the magic of time and salt.
Seasonal Variations You Should Try
The beauty of this recipe is that it begs for experimentation with whatever your market or garden offers. In summer, beets and turnips add earthiness and gorgeous color bleeding through the brine. Pearl onions become almost candy-like when pickled, and in fall, try fennel or thin apple slices for brightness. I've learned that the vegetables don't matter as much as respecting their inherent texture—match delicate things with shorter pickling times and sturdy vegetables with fermentation's deeper journey. Every season brings a new version of this feast to discover.
The Vinegar Choice That Changes Everything
White vinegar is your blank canvas, but once you understand that, you're ready to play. Rice vinegar makes everything taste lighter and more delicate, almost dancing on your tongue. Apple cider vinegar brings a subtle sweetness that makes people not recognize they're eating vinegar-pickled vegetables until it's too late and they're addicted. I once tried champagne vinegar and understood for the first time why people get precious about ingredients—it's because the right one transforms a dish from good to unforgettable.
- Fresh citrus zest muddled into the brine adds brightness that makes your mouth water
- A bay leaf and a star anise create a completely different flavor profile that's darker and more sophisticated
- Turmeric transforms the brine into something that tastes ancient and medicinal in the best way possible
How to Serve This Like You Actually Made It
Arrange your jars on a wooden board with crusty bread, cured meats, and good cheeses, and watch people's faces change as they realize this is homemade. The pickles bridge everything—bright against rich meats, cutting through fat, refreshing between bites. For vegan presentations, pair with fermented cheeses, fresh nuts, and good bread. The secret is giving people permission to eat directly from the jars with small forks; something about that casual elegance says you know what you're doing, even if you made these last week while watching television.
Storage Wisdom and Keeping Things Alive
Pickled vegetables in the refrigerator last for months, their flavor actually deepening over time. Fermented vegetables are living things, so they'll continue to develop, getting tangier and more complex. I keep a jar of each type on rotation—when one runs low, I make a fresh batch so there's always something tangy waiting in the wings. The brine itself becomes liquid gold; use it to dress salads, whisk into vinaigrettes, or sip straight when you need something to shock your system awake.
- Always use clean spoons or forks to remove vegetables, never your fingers, to keep bacteria from colonizing your jar
- If fermented vegetables stop bubbling, they're not dead; they're just entering a calmer phase, but taste them to be sure
- Pickled vegetables that last through winter become holiday gifts and peace offerings all in one jar
 Save
Save When you make this feast, you're not just preserving vegetables—you're bottling up the idea that good food takes time and intention. Every jar is a tiny ecosystem of flavor that grows more interesting the longer you leave it alone.
Recipe FAQs
- → How long should the vegetables be pickled?
Quick pickling requires at least 12 hours of refrigeration, while deeper flavors develop after 48 hours.
- → Can I ferment the vegetables instead of quick pickling?
Yes, fermenting with a 2% salt brine at room temperature for 5–7 days creates a more complex flavor profile.
- → Which vegetables work best for pickling and fermentation?
Crisp vegetables like carrots, cucumbers, radishes, cabbage, cauliflower, and green beans hold texture and absorb flavors well.
- → What spices enhance the pickling brine?
Mustard seeds, coriander seeds, black peppercorns, garlic, bay leaves, dill, and optional chili add depth and aroma.
- → How can I vary the flavor of the brine?
Using different vinegars like rice or apple cider, adding fresh herbs or citrus zest, can create unique flavor twists.